
Excellent Eggs Easter Card that has a hidden surprise!
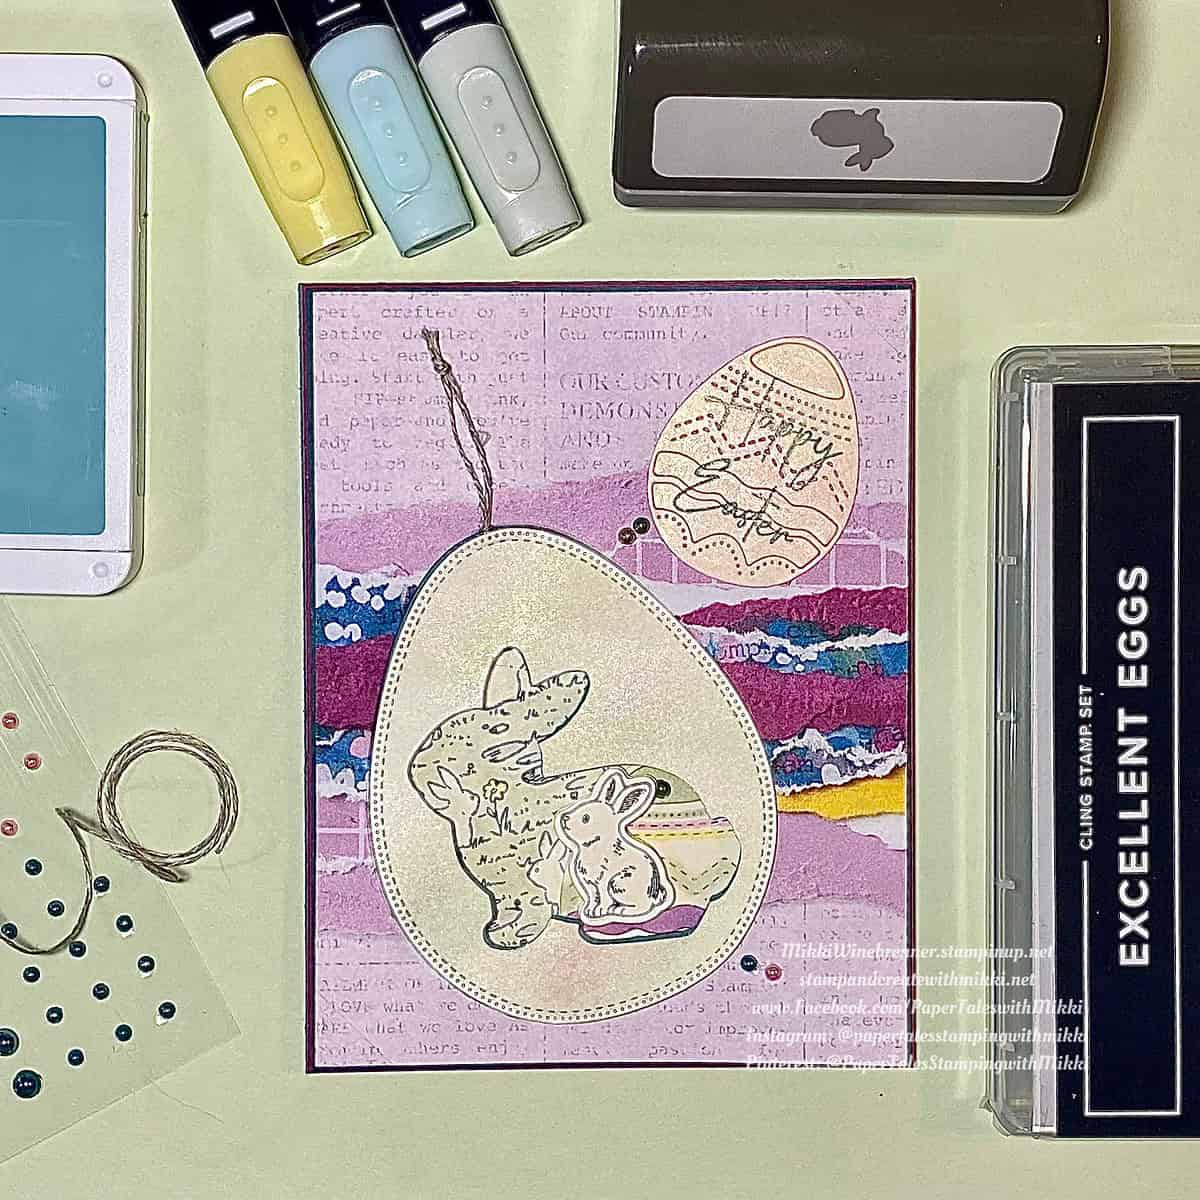
Curious? I would be too. This card started off as a simple easy card using Stampin’ Up!’s Excellent Eggs Bundle and the Easter Bunny Punch.
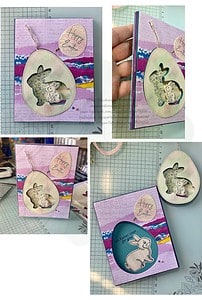
My brain must have had other ideas because one thought led to another and then 💥 things exploded into this:
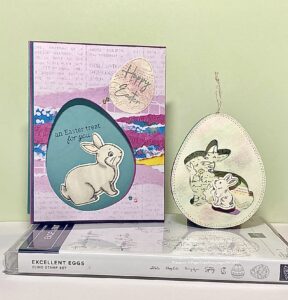
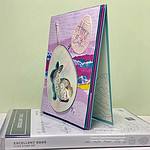
This is card does have many layers to it so mailing it may be a bit tricky but it is a super fun card to give to anyone!
Let’s take a closer look.
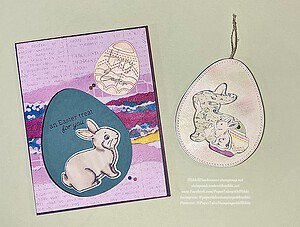
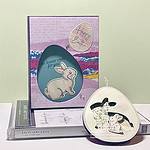
You can see that the egg itself pulls out and behind it is another bunny with a special message.
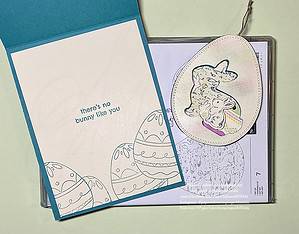
Leaving the card as a standard card also provides a space for you to sign and personalize just as you would with any card!
You can also change the sentiments up a bit and use it a Birthday Card, Celebrate, Think of You or even Happy Spring!
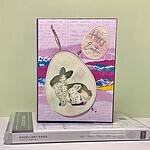
It looks to a little complicated right? It’s not at all! It’s all in layers and using dimensionals to separate them and give them height.
The measurements are:
Lost Lagoon: 4-1/4” x 11” scored at 5-1/2” and 3” x 4”
Berry Burst: 4-3/16” x 5-7/16”
Pretty Peacock: 4-1/8” x 5-3/8”
Very Vanilla: 4” x 5-1/4”, 3” x 4” (x2), scrap pieces for 2 small egg cutouts and a small bunny
Masterfully Made DSP: 4” x 5-1/4”
There is a complete list of product used below or you can head on over to my store and check out all the fun Easter and Spring Items we have available.
Cut out a large egg from all the pieces of card stock and DSP using the 3” x 4” of the Lost Lagoon and only use one of the 3” x 4” Very Vanilla. Make sure the cut is where you want the placement to be for the egg. Set the negative space aside as we will use them to build the card base.
When I cut mine out, I used a pencil to mark the top and bottom of the egg die so I knew where to put it.
Punch out the Easter Bunny from all of the eggs and set them aside. Stamp a Bunny from the Easter Bunny set onto the Very Vanilla before punching. We will be using him later on.
Stamp the large egg onto the last 3” x 4” Very Vanilla. Also stamp the small bunny on a scrap piece. Color in the bunny and the background of the egg if you want. I used Lemon Lolly, Soft Sea Foam, Petal Pink and Smoky Slate Light Blends to do this.
Also stamp 3 or 4 of the medium eggs onto the bottom of the 4” x 5-1/4” using Lost Lagoon ink. As well as your sentiment in the center. Set that aside for later or you can attach it to the inside of the card base.
Cut out the Bunny, Large egg and 2 of the smaller egg. Keep the negative of the small egg, you will need them for the next step.
Color the negative pieces of the small eggs with the blends. I used some old Mica Powder to add a shine to the eggs, this is optional if you have it. You can really decorate them however you want.
Attach the large Very Vanilla, Lost Lagoon and Pretty Peacock eggs (int that order) together, lining up the punched out bunny with Stampin Dimensionals.
Attach one of the small eggs and their negatives to the right side of the stamped large egg with liquid glue. Then attach that as the final layer of the egg ornament.
Attach the small bunny inside the punched bunny with dimensionals.
If you want you can add the Berry Burst egg to the back of the egg to hide any blemishes or just leave as is.
Attach cardstock layers to together from top to bottom, Berry Burst, Pretty Peacock and the DSP with Stampin’ Dimensionals. Attach that to the card base also with dimensionals.
Carefully stamp a saying inside the egg, I used Lost Lagoon ink and the sentiment “An Easter Treat for You”. Attach the Very Vanilla bunny that you punched and stamped with liquid glue just below the sentiment.
Stamp “Happy Easter” on the small egg with all the negative pieces in place, with Lost Lagoon. Attach that to the upper right side of the card front with liquid glue.
Tie a piece of Linen Thread to the egg, wrapping it between layers to keep it somewhat hidden. Tie it off at the top to create a loop for hanging.
Place the egg inside the cut out on the card base.
Add in some Blooming Pearls and thats that!
I hope I have given you a little inspiration for something fun and unique for your Easter need. I am really happy with how this card turned out and super excited for you all to try it!
Join us tomorrow evening 6pm CST for Stamp It Group’s Easter Blog Hop where you can get even more fun inspiration and ideas!!
See you then!
Happy Stamping!!
Product List


")
 Designer Series Paper")

Ink
Card Stock
- Lost Lagoon 8-1/2″ X 11″ Cardstock [133679]
- Pretty Peacock 8-1/2″ X 11″ Cardstock [150880]
- Very Vanilla 8-1/2″ X 11″ Cardstock [101650]
- Berry Burst 8-1/2″ X 11″ Cardstock [144243]
Tools & Adhesive
- Multipurpose Liquid Glue [110755]
- Paper Snips [103579]
- Clear Block Bundle [118491]
- Bone Folder [102300]
Ribbon & Trim