Cap & Gown Graduation Series

Hello Everyone! I know graduations are sneaking up on everyone at what seems to be a rapid pace!  We have my daughter graduating from college this weekend! Im still wrapping my head around that one!!

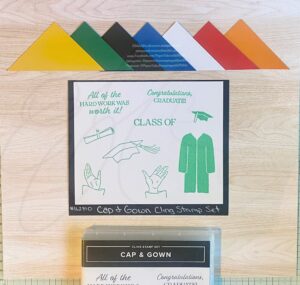
With all the festivities in mind I wanted to give you some last minute ideas and inspiration for a quick graduation card. I will be using Stampin’ Up!’s Cap and Gown Cling Stamp Set.

Planning these out I thought it would be fun to really focus on our local community schools and branch out just a tiny bit into the surrounding areas as well as my daughters University.

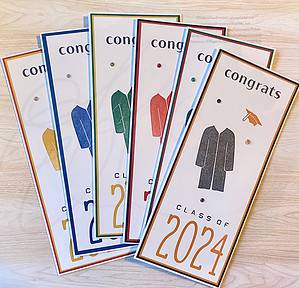
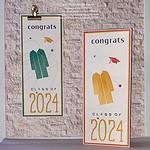
The 4 card designs I will show you this week will have 6 different color combinations. I also have 1 card design that I only have one color combination for. We might just sneak in super fun explosion box as well!!

Let’s get going on these cards. I tried to keep them fairly simple for everyone. Please remember that the color combinations can be changed to do any color that is needed!

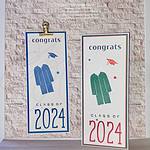
Our first card is a slim line card using Stampin Up’s Cap and Gown Cling set as well as Stampin’ Up Alphabet A’la Mode Dies – Just the numbers!

Slim line cards have a very different measurement than the standard cards. This also means you will need a different kind of envelope. I will touch on that at the end!

Measurements for this card (I will only be using the colors for one card in the measurements!) :

Basic White Cardstock: 7” x 8-1/2” scored at 3-1/2” – base of the card

Basic Black Cardstock: 3-3/8” x 8-3/8”

Poppy Parade Cardstock: 3-1/4” x 8-1/4”

Basic White Cardstock: 3-1/8” x 8-1/8”

After you cut your paper to size and score your base, pull out the numbers 0,2 and 4 from the Alphabet A’la Mode Dies. Line up the numbers in order 024 at the bottom of the 3-1/8” Basic White. Once you have that lined up, cut the numbers out with the Stampin’ Cut & Emboss Machine. Run it through again with only the number 2 at the beginning of the number sequence.

      *SAVE THE NUMBERS!!! I use them in the next card tomorrow!!

As an alternative for the numbers, if you want to simply things even more, you can stamp the 2024 at the bottom of the same piece with the school color – for this sample I would use Poppy Parade stamp pad.

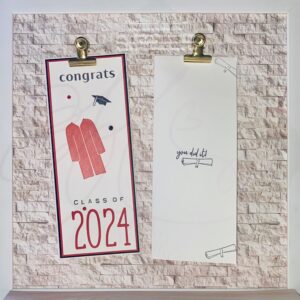
Stamp the word “CONGRATS” at the top of the 3-1/8” Basic White piece and “CLASS OF” above the numbers, both in Tuxedo black.

        ** Funny story: my “Class Of” saying is different from the one in the stamp set because me the brilliant one that I am lost my stamp shortly after pulling it out. The renegade stamp has been discovered and returned to it’s proper place.

Next stamp the robe in the school color of choice and the cap in black or the second school color.

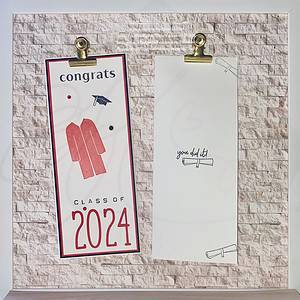
On the inside of the card you will want to stamp your sentiment: I used the sentiment “you did it!”, and stamped it in tuxedo black in the center. I also grabbed the scroll stamp and stamped it directly under the words as well as in the outer two corners.

Let assemble this card up!!

You will want to use your preferred adhesive for this, I love my Multipurpose Liquid Glue. It is so forgiving and gives you just a little time to adjust the paper as you need.

Again, I am doing only color combination but the concept is the same for all of them.

Attach the 3-1/8” Basic White to the 3-1/4” Poppy Parade cardstock.

Attach the Poppy Parade to the Basic Black and then attach to the Basic White card front.

Easy Peasy!

To add just a little bit of a pop to the card, grab those iridescent foil gems and lets change the colors!

Grab the Stampin’ Blend that coordinates with your colors – Dark Poppy Parade and Dark Basic Black for me- Color 2-3 gems in those colors. Simply “paint” them with the blends. Let them dry for a few seconds and now you have custom color Iridescent Foil Gems.

Attach those around the card and we are all done.
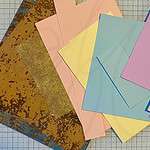
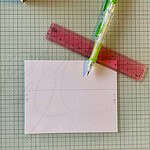
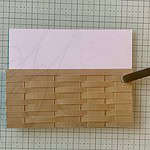
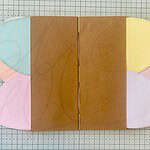
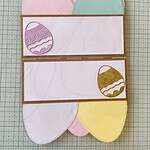
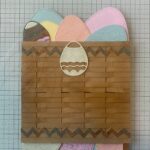
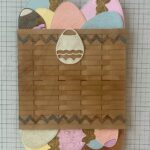
For the envelope:

You have a couple options here. You can use a legal length envelope that you can purchase at a store or you can make your own with DSP. They are super simple to make.

Here is a downloadable template for you. I am a visual person so hopefully this will help.

Slime Line Envelope Template

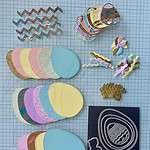
As a mom with a graduate I understand how busy crazy things are getting right now. With that in mind I would also like to offer you an option that I normally would not do.

I have a bunch of these already made up in a variety of colors. If something catches your eye and you would really like to make it but have no time, reach out to me and we can work something out. All of these are available for purchase.

I will be back tomorrow with another fun and simple card for you! Below you will find the entire list of products I used with links to them in my store.

Happy Stamping!!

Product List

Easter Week Excitement!

Hello everyone! I am terribly sorry to have missed everyone last week at the Easter Blog Hop! We had an emergency with my son and spent most of the day at the hospital 😔 He is doing better now and I am finally able to get this amazing card up for you all!

I wanted to kick off the Easter week with something unique and fun. With that said I have for you this really awesome card using Stampin’ Up! Excellent Eggs Bundle and a fun Basket Weave technique!


Let’s just dive right in with this card. I didn’t get all the pictures I wanted to for this process, I admittedly was to excited that it was working and going so well!!🤪

Some of the products you will need are: Excellent Eggs Bundle, Small Blending Brush, Stampin’ Cut & Emboss Machine, StazOn Jet Black Ink, Soft Sea Foam, Pool Party, Bubble Bath, Petal Pink and Pecan Pie Classic Stampin’ Pads, Rainbow Adhesive Dots and Linen Thread. I will have a complete list below with links to them directly in our store.

I didn’t mention paper needed because there is actually a lot of paper, or it seems like a lot at least. Here is what was used in my card, the colors of ink and paper are truly a preference though. My goal was spring pastel colors but you can change things up to however you want to. The measurements will be the same and that is the important part!!😉

Cardstock: Scraps of Pool Party, Lemon Lolly, Petal Pink, Bubble Bath, Sea Foam Green and Fresh Freesia.
Basic White 8-1/2” x 11” Cardstock: 2” x 5-1/4” (x2), scrap for sentiment
Scraps of Oxidized Copper 12” x 12” Specialty DSP and Distressed Gold Paper
Crumb Cake 8-1/2” x 11” Cardstock: 1/4” x 5-1/2” (x25) and 3/4” x 5” – scored at 2-/2” (x5)
Pecan Pie 8-1/2” x 11” Cardstock: 2-1/8” x 5-1/2”

For the basket, I have a quick video for you. It’s not hard at all just complicated to try and explain through words. Being a visual person myself, I always find “show me” to be the best option when possible! 🙃

Basket Weave Video Clip

In this video I am using Tahitian Tide, Parakeet Party and Starry Sky cardstock. I wanted to make it bright and different colors so you could see it better than the crumb cake.

After I assembled my basket of eggs I had this really big feeling that I forgot something. Sure enough, I absolutely did forget a rather important step 🙊

BEFORE you add the eggs to the card, grab a small blending brush and apply some Pecan Pie to the edges of the basket. The goal is to give it depth and make it look less flat. At the very end you will see that I have add lines under some of the pieces, I was attempting shadows that you would find in the layers of the weave. It didn’t end up perfect however the effect is still there.

Let’s get to the rest of the card and cut out some eggs! LOTS OF EGGS!!

I had a couple of moments of pure UH OH happen at this point in the card. Scary how happens when your almost done!

First the actual UH OH I had was that I placed one of the inside panels on upside down. Yup I’m awesome that way and we are just gonna leave it and see if the recipient notices!! 🤦🏼‍♀️

Second was more of a smack of forehead – How is the card going to stay closed? Brilliant time to think of that right!! A quick fix for this was to add little itty bitty magnets to the inside. Not everyone has this microscopic thingys just laying around so another option would be to actually tie a ribbon around it when you are completely finished. 🫣

To finish off the front of the card, I stamped Happy Easter in Soft Sea Foam and fussy cut it out and attached an extra gold bunny behind the sentiment with some Linen Thread to the back of the bunny. Attach the entire sentiment piece to the bottom of the egg we attached earlier. Lastly, I added in some Rainbow Adhesive-backed Dots to the top of the basket for just a little extra decoration.


And that is the creation of my Egg Basket Easter Card!

I hope this inspires you for any last minute card ideas you might need. I will be getting a few more Easter/Spring cards up this week to help get you inspired for Spring!!

Thanks for hanging out with me today! Please reach out with any questions. I know I threw a lot out at once! I do not have a PDF for this particular design, but if requested I will certainly get one written up!

Happy Stamping!!

Product List

Excellent Eggs with Hidden Surprise!

Excellent Eggs Easter Card that has a hidden surprise!

Curious? I would be too. This card started off as a simple easy card using Stampin’ Up!’s Excellent Eggs Bundle and the Easter Bunny Punch.

My brain must have had other ideas because one thought led to another and then 💥 things exploded into this:

This is card does have many layers to it so mailing it may be a bit tricky but it is a super fun card to give to anyone!

Let’s take a closer look.

You can see that the egg itself pulls out and behind it is another bunny with a special message.

Leaving the card as a standard card also provides a space for you to sign and personalize just as you would with any card!

You can also change the sentiments up a bit and use it a Birthday Card, Celebrate, Think of You or even Happy Spring!

This collage shows you the thickness of the card as well as how it looks with the egg in place and with it out.

It looks to a little complicated right? It’s not at all! It’s all in layers and using dimensionals to separate them and give them height.

The measurements are:

Lost Lagoon: 4-1/4” x 11” scored at 5-1/2” and 3” x 4”

Berry Burst: 4-3/16” x 5-7/16”

Pretty Peacock: 4-1/8” x 5-3/8”

Very Vanilla: 4” x 5-1/4”, 3” x 4” (x2), scrap pieces for 2 small egg cutouts and a small bunny

Masterfully Made DSP: 4” x 5-1/4”

There is a complete list of product used below or you can head on over to my store and check out all the fun Easter and Spring Items we have available.

Cut out a large egg from all the pieces of card stock and DSP using the 3” x 4” of the Lost Lagoon and only use one of the 3” x 4” Very Vanilla. Make sure the cut is where you want the placement to be for the egg. Set the negative space aside as we will use them to build the card base.

When I cut mine out, I used a pencil to mark the top and bottom of the egg die so I knew where to put it.

Punch out the Easter Bunny from all of the eggs and set them aside. Stamp a Bunny from the Easter Bunny set onto the Very Vanilla before punching. We will be using him later on.

Stamp the large egg onto the last 3” x 4” Very Vanilla. Also stamp the small bunny on a scrap piece. Color in the bunny and the background of the egg if you want. I used Lemon Lolly, Soft Sea Foam, Petal Pink and Smoky Slate Light Blends to do this.

Also stamp 3 or 4 of the medium eggs onto the bottom of the 4” x 5-1/4” using Lost Lagoon ink. As well as your sentiment in the center. Set that aside for later or you can attach it to the inside of the card base.

Cut out the Bunny, Large egg and 2 of the smaller egg. Keep the negative of the small egg, you will need them for the next step.

Color the negative pieces of the small eggs with the blends. I used some old Mica Powder to add a shine to the eggs, this is optional if you have it. You can really decorate them however you want.

Attach the large Very Vanilla, Lost Lagoon and Pretty Peacock eggs (int that order) together, lining up the punched out bunny with Stampin Dimensionals.

Attach one of the small eggs and their negatives to the right side of the stamped large egg with liquid glue. Then attach that as the final layer of the egg ornament.

Attach the small bunny inside the punched bunny with dimensionals.

If you want you can add the Berry Burst egg to the back of the egg to hide any blemishes or just leave as is.

Attach cardstock layers to together from top to bottom, Berry Burst, Pretty Peacock and the DSP with Stampin’ Dimensionals. Attach that to the card base also with dimensionals.

Carefully stamp a saying inside the egg, I used Lost Lagoon ink and the sentiment “An Easter Treat for You”. Attach the Very Vanilla bunny that you punched and stamped with liquid glue just below the sentiment.

Stamp “Happy Easter” on the small egg with all the negative pieces in place, with Lost Lagoon. Attach that to the upper right side of the card front with liquid glue.

Tie a piece of Linen Thread to the egg, wrapping it between layers to keep it somewhat hidden. Tie it off at the top to create a loop for hanging.

Place the egg inside the cut out on the card base.

Add in some Blooming Pearls and thats that!

I hope I  have given you  a little inspiration for something fun and unique for your Easter need. I am really happy with how this card turned out and super excited for you all to try it!

Join us tomorrow evening 6pm CST for Stamp It Group’s Easter Blog Hop where you can get even more fun inspiration and ideas!!

See you then!

Happy Stamping!!


Product List