


I am very much behind the clock with my 12 Days of Christmas project for you all. We started on December 5 over on Facebook and Instagram. Life has been super chaotic and I haven’t had a chance to get them up here for you guys. I will correct this over the weekend!!
I will group these together in 3 day batches to make this simpler. I am working on a full Tutorial for all the projects. I am using a new program for that and it’s definitely been a learning curve but I’m slowly figuring it all out.
Lets dive straight into the first 3 days of our 12 Days of Christmas Projects!
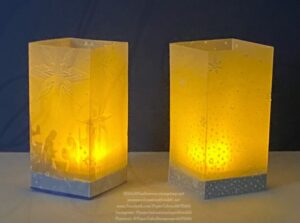
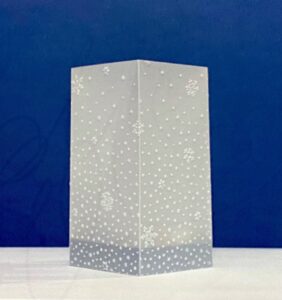
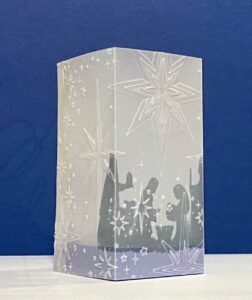
Day 1 of our 12 Days Of Christmas Projects, I wanted to keep things simple for our first one. These luminaries are not only gorgeous but super simple to make and take very little materials.
Luminaries are actually a fun project in general, not just during the Christmas season but year round. You can customize these to whatever holiday, special occasion or favorite things (😉 snowflakes are my favorite!)
I was very excited how they turned out, especially the star one, that was a last minute lets try this idea! The manger scene is actually the negative of a die that I used as a stencil! I will have a tutorial for you on everything you need to know about this project, including how I did that silhouette!
—————————————————————————————————————————
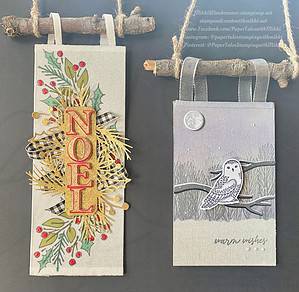
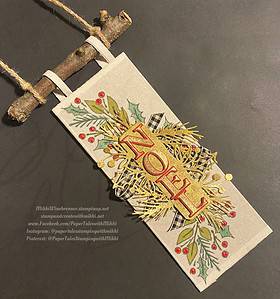
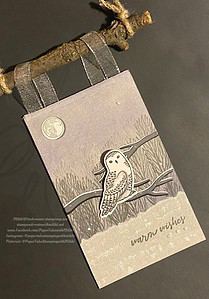
Day 2 of 12 Of Christmas Projects!
This second project is a simple hanging sign for your home or as a gift. There is a little story behind these, I wanted to do a simple hanging, as you can see they absolutely exploded 😂! (I posted these a little later then planned, time management sometimes is not my friend!)
They are fairly simple to create. The paper I used (Linen Specialty Paper )for both of these is sadly no longer available but you could use any of our gorgeous Designer Series Paper, or any of the specialties to create a backdrop for your design. I also used an actual stick that Miss Daisy helped me find in our yard (she was slightly offended that I brought it inside 🤣) as the hanger.
The NOEL hanging is shimmery and bright, perfect for the festive season. The Warm Wishes hanging is more winter, calm, peacefulness and warmth.
I was really wanting you guys to see how you can take any project you find, a pattern, and idea on Pinterest, something you want to CASE from me, you can change things up completely and make it yours!
—————————————————————————————————————————

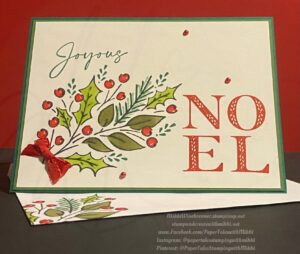
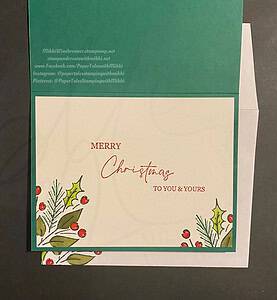
Day 3 of our 12 Days of Christmas Projects!
This project we are kicking it back old school with just Stamps Ink and Paper and a few embellishments of course. Speaking of embellishments, please note there is a tiny red bow on the card front. I did that! Without the assistance of a fork! Its the little things sometimes 🙃
This card was fun to create. It’s nice to fall back to the basics, regroup your mind and inspiration.
General overview of this card, I used the Joy of Noel stamp set. I also used our Stampin’ Blends for the coloring.
This card would be super simple to create in large quantities. Simple yet elegant, just the way it should be.
—————————————————————————————————————————
I had an awesome big brain moment and figured out how to share a link to the file for the tutorials! I truly need an adultier adult sometimes!
Here is the link to the file: 12 Days of Christmas Project Tutorials
As I get new ones completed the file will automatically update and I will let you know when that happens so you can grab it!
These tutorials are FREE, a gift from me to you for the holidays and hopefully future special occasions!
I will get the rest of the projects uploaded here hopefully tomorrow!
Happy Stamping!!